DIY Coffee Table Design Course

Course Abstract
What is this course about?

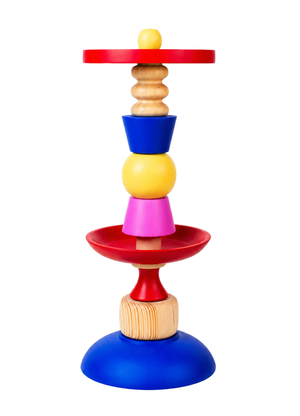
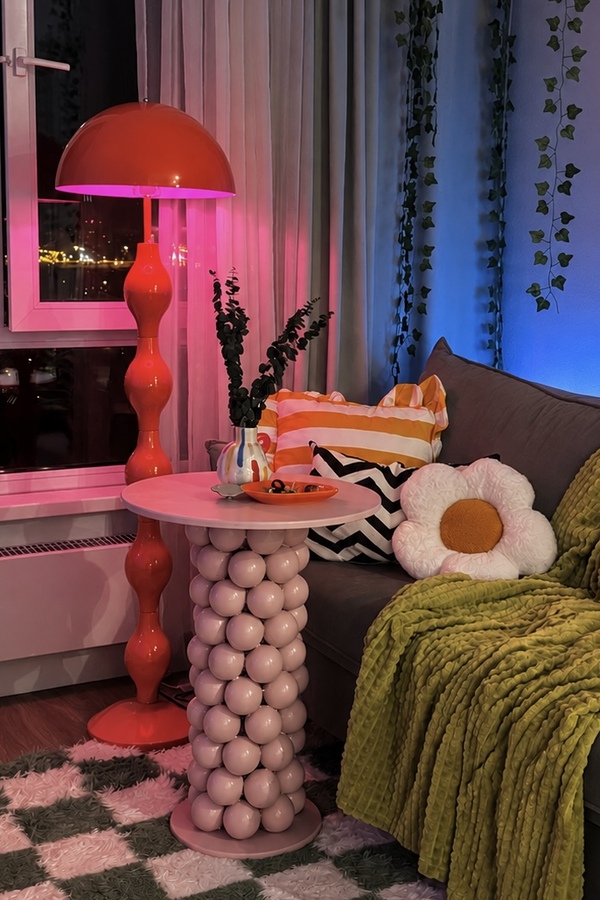
«DIY: DIY Coffee Table» — a practical online course where participants independently create a decorative coffee table from readily available materials. The learning process is structured as a step-by-step photo guide: each stage is accompanied by process photographs, explanations, and practical assignments. From material preparation to the final lacquer coating, the participant systematically goes through the entire process of creating their own interior piece.
Unique Selling Proposition — Competitive Advantage
Creating original furniture pieces without specialized education, a professional workshop, or complex technologies. The course integrates accessible materials, simple manufacturing techniques, and expressive design within the aesthetics of the dopamine interior. The main principle: minimum theory—maximum practice.
CLASSROOM AND COURSE FORMAT
Course Classroom

This course is designed for beginners and is suitable for: — DIY and creative enthusiasts; — individuals interested in interior design; — those who wish to create furniture and decor items independently; — people with no prior experience working with furniture constructions. No prior preparation is required.
Course Format
Format: Online, asynchronous. Content Type: Step-by-step photographic instructions with textual explanations. Structure: 7 sequential stages. Duration: Approximately 4–6 hours of active work, not accounting for material drying time. Participants complete the course at their own pace, independently managing work time while allowing for necessary breaks during the process.
MATERIALS AND TOOLS
REQUIRED MATERIALS

— Cardboard tube—84 mm diameter, height is determined individually. In the presented project, a tube of 780 mm length was used, shortened to 650 mm. — Round art boards—two pieces, 500 mm and 300 mm in diameter. Used as a tabletop and base. — Decorative plastic balls—70 mm diameter. A set of 100 pieces was used. — Construction adhesive «liquid nails”—a compound compatible with the joining materials. — Furniture primer—ATURI Design. — Furniture paint—Balisteri, Baby Pink 16 shade, 750g can. — Matte furniture lacquer—ATURI Design.
TOOLS
— Electric jigsaw for adjusting bushing height as needed. — Tape measure or ruler. — Pencil and compass. — 50 mm painter’s brush. — Small brush for hard-to-reach areas. — Painter’s roller—optional. — Newspaper or protective covering for the work surface. Note: For priming, painting, and lacquering, one painter’s brush can be used, provided it is thoroughly cleaned between stages.
EDUCATIONAL OUTCOMES
What will participants learn?

Upon completing this course, participants will be able to: — Select materials and tools independently for a DIY project; — Mark and prepare structural components; — Assemble parts using mounting adhesive; — Prepare surfaces for painting; — Perform layered painting and decorative finishing; — Apply a protective top coat; — Create a functional interior object with their own hands.
PRACTICAL SECTION
The entire course is built around a single project: designing and constructing a coffee table. Each stage includes a practical assignment and self-assessment of the result. The final outcome of the program is a complete interior design piece, created entirely by the participant.
THEMATIC PLAN
7 STEPS TO CREATING A MAGAZINE TABLE

- Material Preparation Familiarization with the table’s structure, selection of materials and tools, and workspace organization. Result: Everything necessary is prepared for work.
- Part Preparation and Assembly Determining the centers of the art boards, marking the bushing position, adjusting its height, and joining the structural elements with construction adhesive. Result: The frame of the coffee table is assembled.
- Priming Applying primer to the structure’s surfaces and allowing it to dry. Result: Surfaces are prepared for painting.
- Base Coating Applying the first coat of furniture paint and allowing it to dry. Result: The foundation of the color finish is established.
- Decorative Detailing Securing the plastic balls with construction adhesive and priming the decorative elements. Result: A decorative volume is created for the center of the table.
- Layered Painting Applying the second and third coats of paint to the structure and sequentially painting the decorative balls. Detailing hard-to-reach areas. Result: A uniform decorative finish is achieved.
- Finishing Applying matte furniture varnish, drying, and final inspection of the piece.
TEACHING METHODOLOGY
Curriculum Structure Logic
The course is built upon a linear-chronological learning model: each subsequent stage builds upon the result of the previous one. Photo instruction $\rightarrow$ Practical assignment $\rightarrow$ Self-assessment $\rightarrow$ Next stage Each learning block includes: — A description of the task. — Step-by-step photos of the process. — Recommendations for working with materials. — A practical assignment. — A self-assessment checklist.
SELF-ASSESSMENT SYSTEM

After completing the task, the participant verifies the result against the established criteria. For example: — Details are prepared and dimensions are checked. — Structural elements are securely joined. — Surfaces are evenly finished. — The coating has dried before the next stage. After completing the required points, the participant moves to the next block.