In Lesson 4, we created a coral using three layers—geo, mtl, and xform. Now, we will assemble a riff using these to populate the entire sequence with hundreds of corals on the ground. If we were to copy the geometry to every point, the file size would be the sum of all copies. Therefore, we do not write the geometry into the riff file.
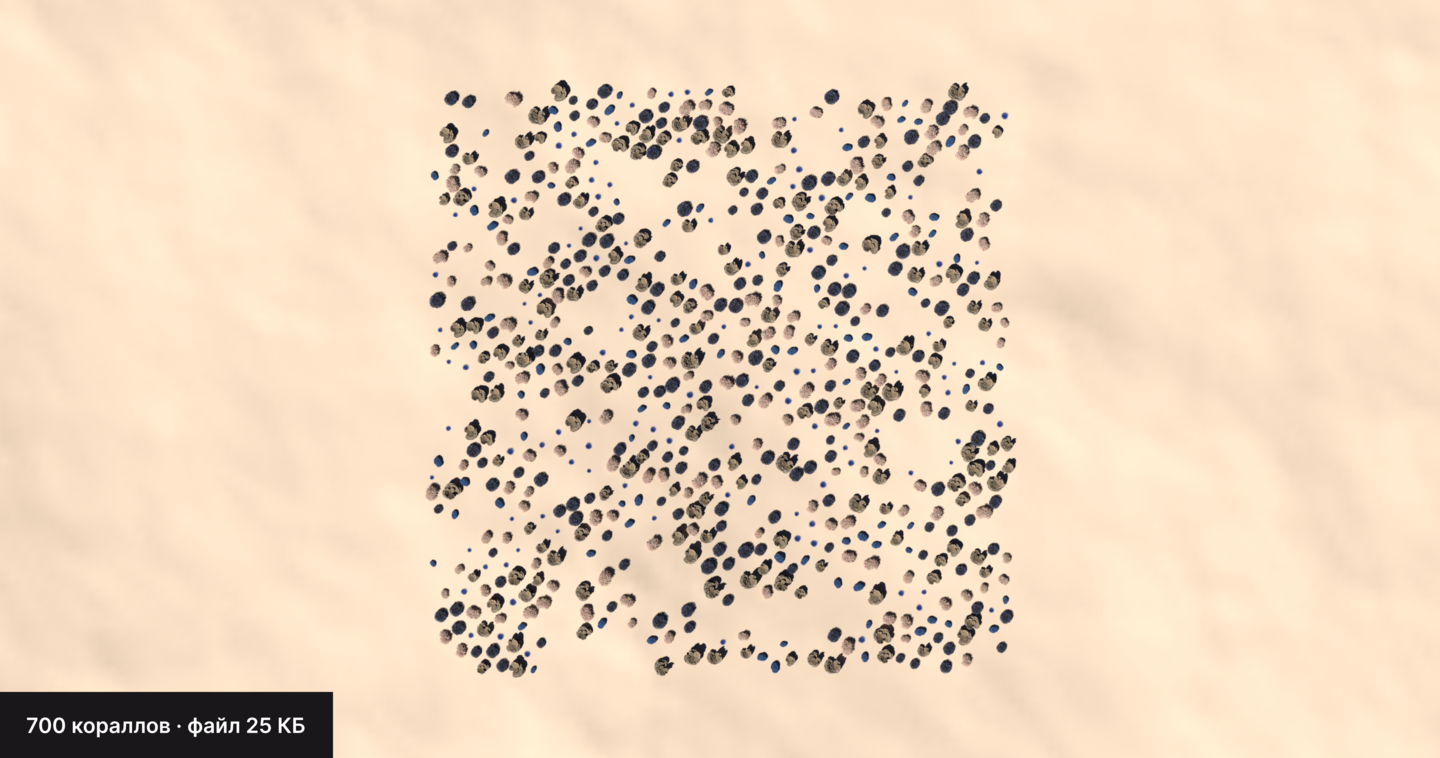
The reef file has no meshes. Only points, and the corals come from their own layers.
1. Links and Instances
The SubLayer from Lesson 4 places the coral in the same location where it is defined in the files, in /World/env/corals. For the reef, it is needed in /protos, where the templates for copies are located. The reference handles this.
A reference places one primitive from another file into our scene, regardless of its path. Only the address of that primitive is written to our file. This is the letter R in LIVERPS from Lesson 1.
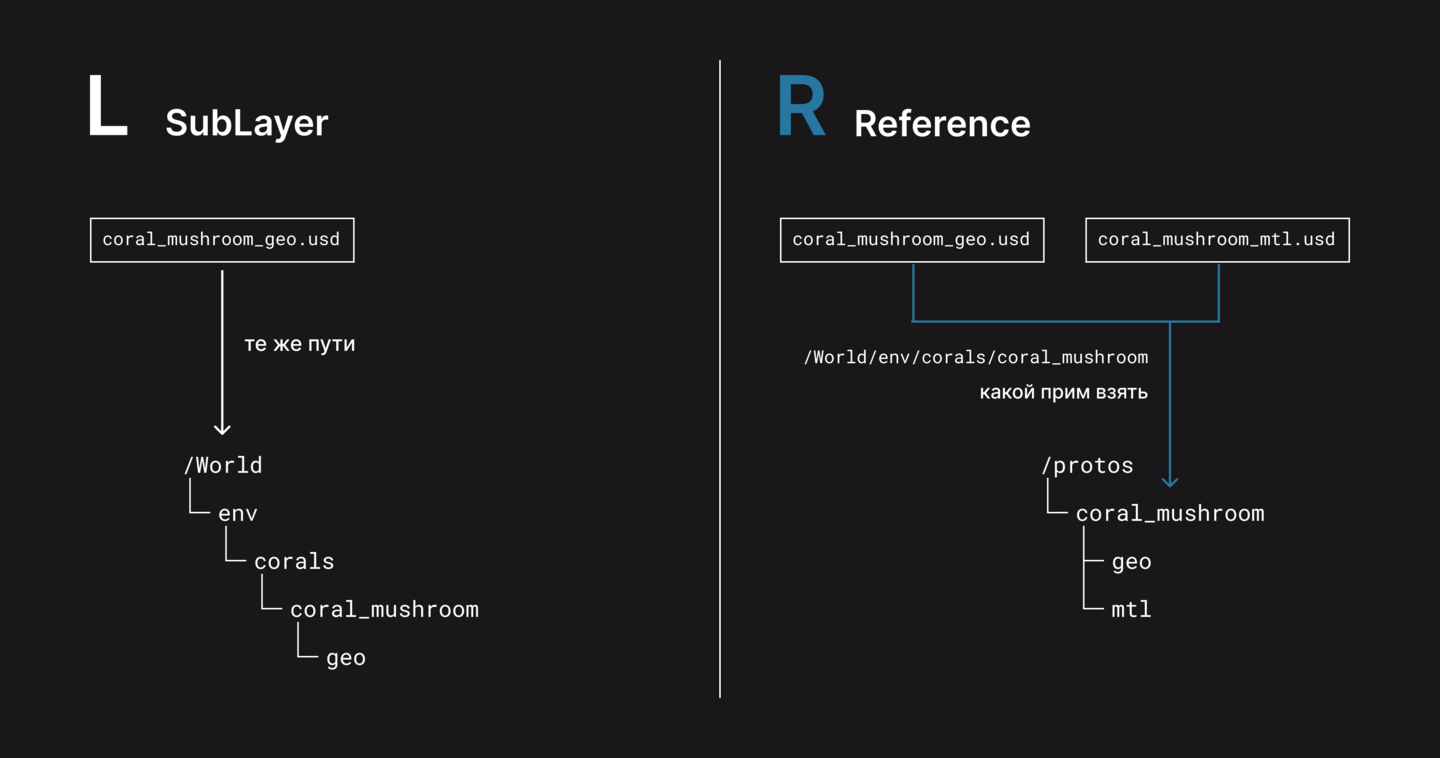
The example shows five types of coral, but there are many, many on the reef. We place each type once, linking to its layers, and assemble the reef from copies. The USD holds each type in memory only once, no matter how many copies exist.
The original from which copies are made is called a prototype, and the copy is an instance. The instance has its own position, rotation, and scale, but shares the geometry and material.
PointInstancer places instances. All the riff is recorded within it as arrays of numbers, making the file light even with thousands of copies. However, an individual coral is no longer a primitive; you cannot select it in the tree.
PointInstancer is one primitive for all copies. It contains the points, and each one has a prototype number, location, rotation, and scale.
2. Node Setup
The reef scene is assembled in /stage; the numbers indicate the node order.
1. A SubLayer with the skeleton and a Reference with the ground.
2. Layer Break. Everything above will not be included in the reef file.
3. Primitive creates the /World/env/reef branch with a kind group.
4. Reference places the coral prototypes.
5. PointInstancer assembles the reef based on points from the SOP.
6. USD ROP writes the reef file. The lighting is on a separate branch, solely for viewing.
We prepare the points in SOP; the numbers show the node order.
1. LOP Import takes terrain from /stage, and Unpack USD converts it into polygons.
2. Grid creates a reef field above the terrain.
3. Ray projects the field onto the terrain.
4. Normal and Scatter and Align distribute the points along the slope.
5. Attribute Randomize sets the coral size.
6. Attribute Randomize sets the coral type.
7. Null sends the points to the PointInstancer.
The Grid defines the reef area, and the Ray projects it onto the ground from the second entrance.
1. In Size, set the field dimensions—in the example, 120×120m.
2. Set Center above the ground; in the example, 20 on the Y-axis.
3. Increase the density of Rows and Columns so the grid conforms to the terrain.
4. In Direction Source, select Vector; otherwise, the ray travels along the grid’s normal instead of downward.
5. In Direction, enter 0, -1, 0 to travel strictly downward.
Scatter and Align scatters points with orientation; the coral will then adhere to the slope and rotate accordingly.
1. In the Point Count Method, set the Number of Points to the total number of corals.
2. Orientation > Rotation > Max Random Cone Angle provides a slight tilt, as seen in Example 6.
3. In the same section, set Rotation Around Normal > Max Angle to 360.
Do not enable Remove Overlapping Points, as this will reduce the number of points.
The Attribute Randomize feature assigns a unique size to each coral instance.
1. In Attribute Name, enter pscale; the PointInstancer will read this value as the size.
2. Set Dimensions to 1, using a single number for the size.
3. Min Value and Max Value define the spread—in this example, from 8 to 14. If we used the original coral assets, which are 15–30 cm, they would be lost in this environment, but this technique allows them to grow to several meters.
The second Attribute Randomize selects the coral species at each point—no VEX or tons of code needed.
1. In Attribute Name, enter protoname.
2. In Distribution, select Custom Discrete.
3. Set Type to String, and Number of Values according to the number of species.
4. In Value, enter the prototype names (e.g., coral_mushroom) and other names, and in Weight, enter the proportion of that species. The names must match the primitives in /protos.
The SOP contains no coral whatsoever. Only dots, and on these dots, you’ll find the coral’s size, rotation, and name.
Reference places prototypes in the /protos branch. PointInstancer will copy them, and the branch itself will not appear in the file.
1. Set the Number of References to two for the coral (mtl, geo).
2. In Primitive Path, set both to /protos/coral_mushroom.
3. In File Pattern, set the geo-layer in the first one and the mtl-layer in the second.
4. In Reference Primitive, select Reference Specific Primitive and point to the coral itself, not to /World.
PointInstancer places prototypes at points from SOP.
1. In Primitive Path, type /World/env/reef/corals.
2. Set Primitive Kind to Group; otherwise, the model chain will break.
3. In Prototypes › Source › Primitives, select all prototypes from the second input.
4. Set SOP Source to External SOP, and in SOP Path, use the last Null network of points.
5. Clear Point Attributes to Copy, otherwise the point attributes will appear in the file as primvars.
6. Set Prototype Index to String Attribute, and enter the protoname in the adjacent field.